

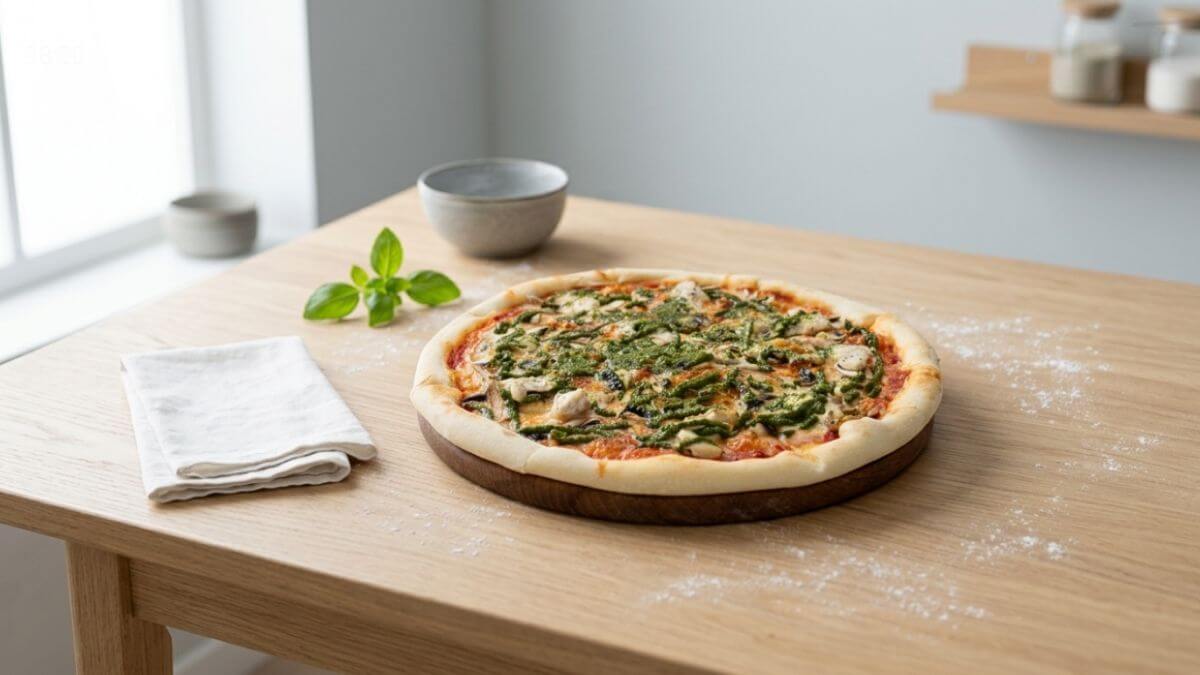
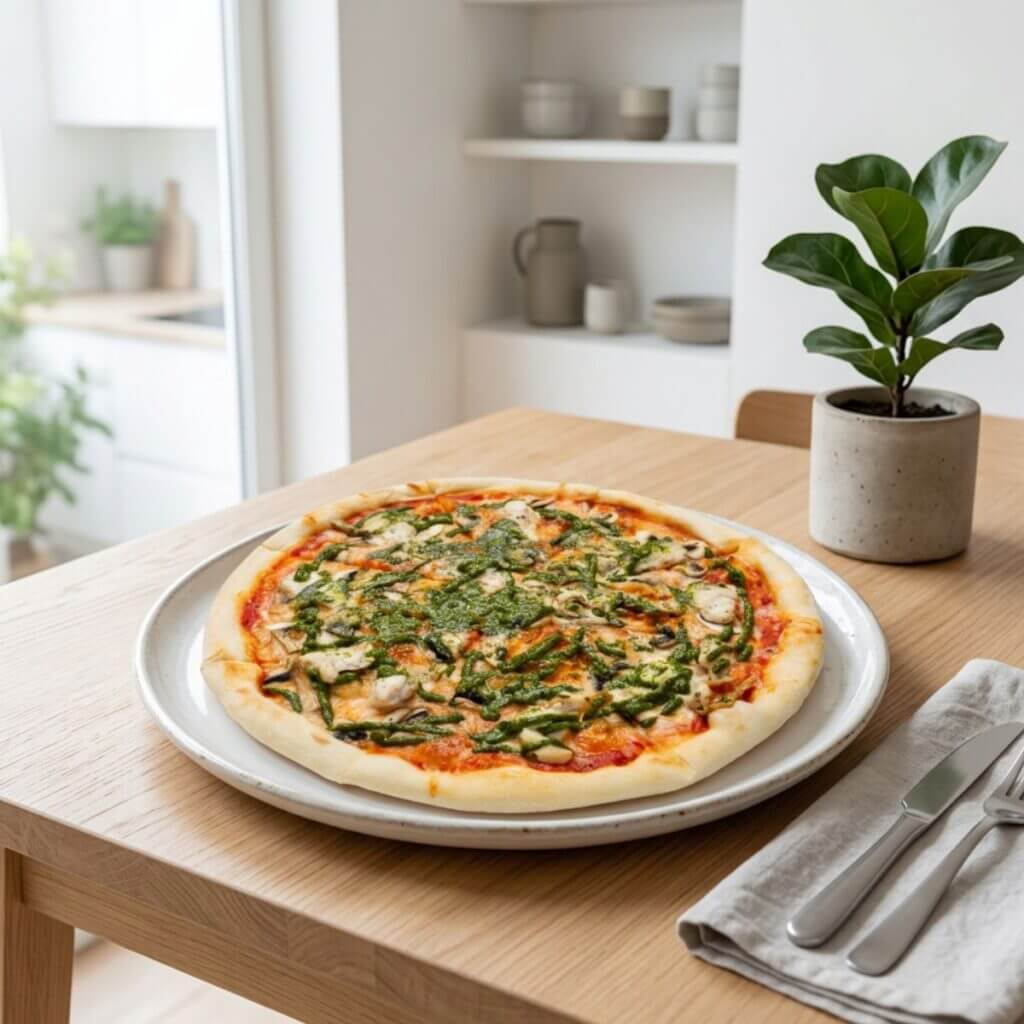
Chicken pesto pizza is the kind of weeknight meal that sounds fancy but lands on the table in under half an hour. You get a crispy crust, soft mozzarella, flavorful pieces of seasoned chicken — and the topping is a spoonful of cool, fresh pesto that brushes every bite with basil and parmesan. The trick in this version is simple: the pesto never goes in the oven. It’s spread on once the pizza is finished and hot, so the aroma stays intense and the oil stays clear.

Advertisement: The page displays ads and contains advertising links (affiliate links). See our advertisers here.
In my Cosori Dual Blaze the pizza fits perfectly on the top rack, and the 200 °C air circulation gives the crust that signature crispy edge without burning the top. You don’t need a pizza stone or a pizza peel — just a piece of parchment paper that fits the basket, and you’ve got a restaurant-worthy pizza ready in 8-10 minutes.
Estimated reading time: 5 minutes
Table of Contents
Why I love chicken pesto pizza in the airfryer
Pesto pizza is classic Italian-inspired comfort food, but most people have only tasted the version where the pesto is baked in — and that’s a mistake. When basil pesto hits 200 °C, it loses its fresh aroma and turns brownish and bitter. My solution is to make the pizza like a regular white pizza with mozzarella and chicken, and top it with spoonfuls of cool pesto after baking. You get both the warm, melted pizza feel and the fresh, tangy basil explosion at the same time.
Why pesto only after baking?
Pesto consists mainly of fresh basil leaves, crushed garlic, pine nuts, parmesan and olive oil — all ingredients that are sensitive to heat. The leaves oxidize and turn dark, the oil starts to separate, and the garlic becomes harsh. When you instead spread the pesto on the hot pizza right after it comes out of the airfryer, it gets just warm enough to melt into the cheese — but keeps its green color and fresh flavor.
My kitchen test of chicken pesto pizza
I’ve tested the combination in both my Cosori Dual Blaze and a Philips XXL. The small 18-20 cm airfryer pizza fits perfectly in a basket. At 200 °C the crust takes 8-10 minutes to turn crispy and golden, and the chicken — which I season with oregano, garlic powder and a little salt beforehand — reaches an internal temperature of around 75 °C in the same time, as long as the pieces aren’t too big. I use pre-cooked chicken from the day before or leftovers from a rotisserie chicken, so I avoid raw chicken juices dripping down into the crust. Compared to a regular pizza oven the airfryer is about 30 % faster and gives a more pronounced edge crust.
Use a store-bought pizza crust if you’re short on time, but make your pesto from scratch. The difference is astronomical — basil bought potted at the supermarket, a handful of pine nuts, a clove of garlic, and you’ve got five minutes of work for a completely different flavor.
Tips and tricks from the author: Morten Jensen
Common mistakes and how to avoid them
The most common mistake is loading the pizza with raw chicken. Raw chicken releases liquid when heated, and the crust turns soft and soggy; always use pre-cooked chicken or leftovers. The next mistake is too much cheese — people want a cheesy pizza, but in the airfryer the cheese bubbles up and can burn the top before the crust is crispy, so a thin, even layer is enough. The third and most important mistake is putting the pesto in the airfryer — pesto should never be exposed to direct heat, as it destroys color, flavor and nutrients in an instant.
How to serve chicken pesto pizza
The pizza tastes best when it’s freshly baked and the pesto has just been spread on. The light, fresh topping pairs beautifully with classic Italian sides:
- A simple arugula salad with lemon vinaigrette and parmesan shavings
- Homemade garlic dip or a cold tzatziki
- A glass of cold rosé wine or a crisp lager
- Fresh Italian country bread if you’re serving the pizza to several people as an appetizer
Storage and reheating
The pizza keeps in the fridge covered for up to 2 days. Reheat it in the airfryer at 180 °C for 3-4 minutes — avoid the microwave, as it softens the crust. Always spread the pesto on after reheating, never before. If you make extra pesto, it can be frozen in ice cube trays and keeps for 2-3 months; thaw in the fridge overnight and stir in a small splash of olive oil before using.
Chicken pesto pizza is the perfect example of how little it takes to get an Italian flavor bomb out of a regular airfryer. The trick is in the timing: the pesto always goes on last. Try it tonight and experience how a cool spoonful of freshness on a hot pizza changes the whole impression.
FAQ
It’s not recommended. Raw chicken releases liquid during baking, which makes the pizza crust soft and soggy. Use pre-cooked chicken, leftovers from a rotisserie chicken, or pan-fry the chicken strips for 3-4 minutes first, and you’re on the safe side.
Homemade always wins on flavor: fresh basil leaves, pine nuts, parmesan, garlic and good olive oil blended for 30 seconds beats any jarred pesto. But a good-quality store-bought pesto works fine on busy weekdays; choose one with visibly green hues and olive oil as the first ingredient on the label.
Recipe
Chicken pesto pizza in airfryer
Cooking Guide
Keep the screen on and follow the recipe step by step while you cook.
Step 1:
Avoid the screen turning off while you cook.
Step 2:
Start the guide and follow the recipe one step at a time.
Cost of the dish
Prices may vary depending on where you shop.
Our estimate is based on average food prices for the current year 2026.
Estimated price for the whole dish:
Airfryer size
All our recipes are tested in a Philips Airfryer 2000 Series NA230/00 – 6.2 L
Does the recipe fit my Airfryer?
If you’re unsure, you can always reduce by one serving in the recipe, or click the 0.5x button.
You can also Ask the AI Chef
It’s easy! Just press the Ask the AI Chef button you see at the bottom.
Recommended equipment
- 1 Air fryer
- 1 Cutting board
- 1 Knife
- 1 Mixing bowl
- 1 Pande
- 1 Bagepapir (til airfryer)
Shopping list
Ingredients
How to make it
Preparation
- Stir 7 g dry yeast into 150 ml lukewarm water in a mixing bowl and let it sit for a couple of minutes. Add 250 g all-purpose flour, 1 tbsp olive oil and 1 tsp salt, and knead the dough together for 5-7 minutes, until it is smooth and elastic.

- Cover the bowl with a kitchen towel and let the dough rise in a warm place for about 30-45 minutes, until it has doubled in size.
- Cut 200 g chicken breast into small cubes or strips. Heat 1 tbsp olive oil in a pan over medium-high heat and brown the chicken for 4-5 minutes along with 1 tsp Salt and pepper, until cooked through. Remove the pan from the heat and let the chicken cool slightly.
- Preheat the airfryer to 200 °C convection.
Cooking in airfryer
- Divide the risen dough into two portions and roll or press each piece into a round or oval pizza base that fits in the airfryer basket. Place each base on a piece of baking paper trimmed to the shape of the pizza.
- Spread 150 g pizza sauce evenly over the two bases and sprinkle with 150 g grated mozzarella and 30 g parmesan. Spread the browned chicken on top of the cheese.
- Lift the first pizza with the baking paper into the airfryer basket and bake at 200 °C for 8-10 minutes, until the cheese is bubbling and the base is golden and crisp. Repeat the baking with the second pizza.
Serving
- Take the pizzas out of the airfryer and dollop 4 tbsp green pesto over the hot pizzas. Garnish with 1 handful fresh basil and serve immediately, while the cheese is still melted.
Our notes for the recipe
Always place baking paper under the pizza base so that it does not stick to the airfryer basket, and trim the paper so that it only sticks out slightly over the edge of the pizza. Pesto is ALWAYS added only after baking, because the freshness of the basil and the flavor of the olive oil disappear at high heat. Variation:
Replace the green pesto with red pesto for a more intense, sun-ripened tomato flavor, or add sun-dried tomatoes, arugula or fresh mushroom slices as extra topping. A vegetarian version is easily made by replacing the chicken with grilled vegetables or halloumi cubes. Serving:
Serve the pizza with a light green salad of arugula, cherry tomatoes and parmesan shavings drizzled with a good olive oil – perfect for a cozy Friday or a quick weekday dinner. Portion size:
If your airfryer is smaller, you can divide the dough into several smaller, individual pizza bases and bake them one at a time.
Your notes for the recipe
Nutrition per serving (Guideline)
Important about shelf life and nutrition
Nutrition per serving (guideline): Calculations are based on data from the United States Department of Agriculture (USDA). Shelf life (guideline): Shelf life data is provided, as far as possible, by public institutions, including national food authorities. Our information is therefore only indicative, and it is your responsibility to obtain and calculate accurate information about shelf life and nutrition for all recipes on airfryerkogebogen.dk
Easily share the recipe with others:
Via email or on Facebook
Open the recipe on your phone
Scan the QR code with your phone and get the recipe directly on your mobile while you cook.

Author
Airfryerkogebogen.dk