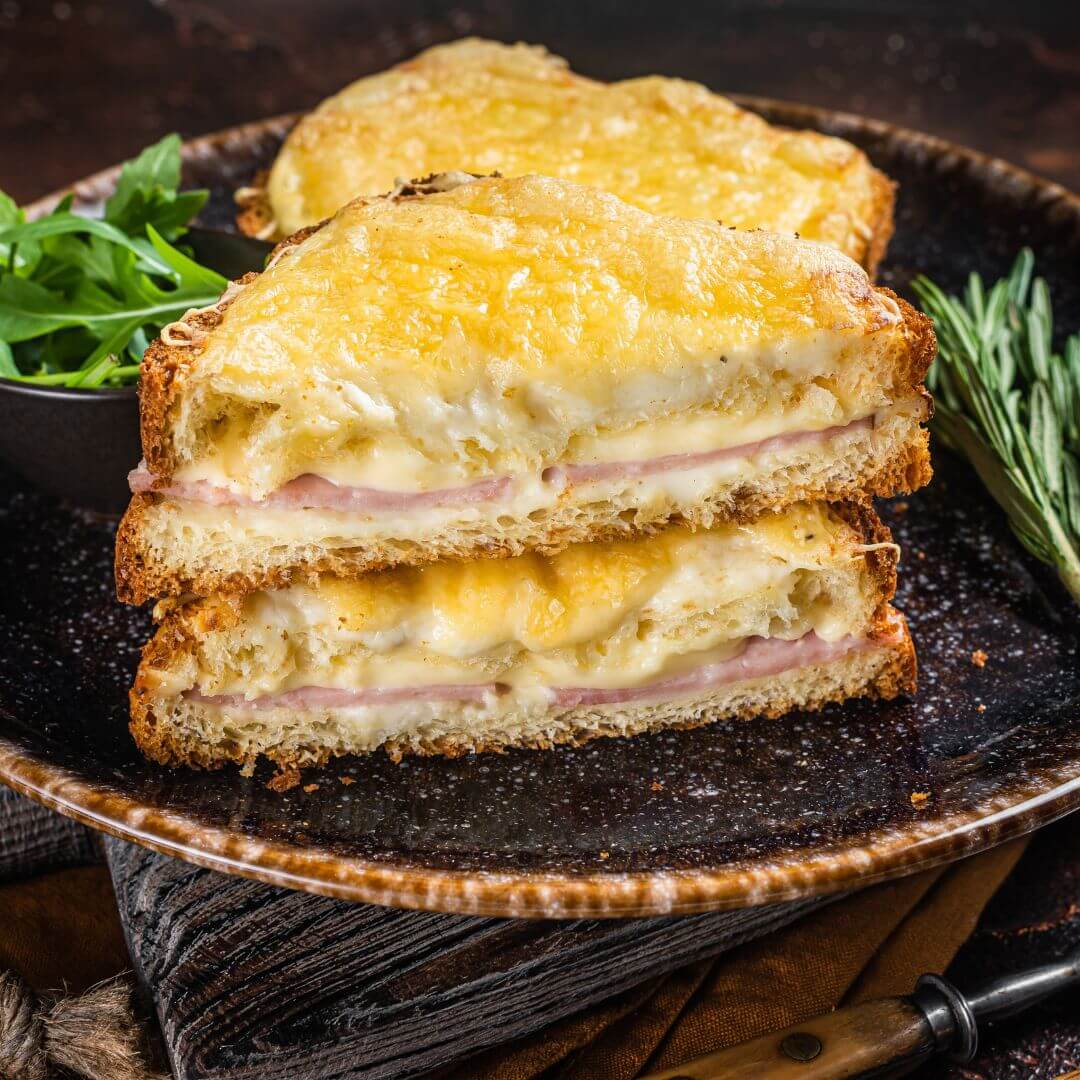


Grilled cheese sandwich is the kind of food you keep coming back to. Two slices of sandwich bread with ham and cheese, buttered on the outside and topped with a layer of grated cheese that melts over the edge and turns into a crispy, golden cheese crust. In Norway, it’s a year-round fixture on café lunch menus, and here at home it’s become my go-to for something warm and filling in the middle of the day.

Advertisement: The page displays ads and contains advertising links (affiliate links). See our advertisers here.
The airfryer makes the job easier than a frying pan. The heat circulates around the bread, so both sides turn crispy without you having to stand there flipping it, and the cheese on top turns golden and bubbly at the same time as the filling inside melts. From the moment you take out the bread until the sandwich is on the plate, it takes 20 minutes.
Estimated reading time: 4 minutes
Table of Contents:
Why I love the grilled cheese sandwich in the airfryer
What sets the grilled cheese sandwich apart from an ordinary sandwich is the butter on the outside. The bread gets a seared surface instead of just being toasted, giving it a crackling texture with a slightly nutty flavor. When you add grated cheese on top, it melts into the surface of the bread and forms a crispy cheese edge along the sides — that’s the detail people remember.
In the airfryer, you get both at once. The hot air hits the sandwich from every side, so the underside turns just as golden as the top, and you avoid the classic pan problem where the cheese on top is still cold while the bottom is starting to burn.
Airfryer vs. frying pan
With a frying pan, you’re working with heat from one side at a time, and you have to flip the sandwich at exactly the right moment. The cheese on top only melts if you put a lid on — and then the bread goes soft from the steam. The airfryer solves both problems: the dry, circulating heat keeps the surface crispy while the heat reaches all the way through. You don’t touch the sandwich while it cooks, and there’s no pan with burnt cheese left behind afterward.
My kitchen test of the grilled cheese sandwich
I’ve made the sandwich in my Cosori Dual Blaze, and 180°C for 10 minutes hits the mark exactly. At higher heat, the grated cheese on top turns dark long before the ham and cheese inside are heated through, and at lower heat the bread dries out before the top turns crisp and golden. With 10 minutes of prep, the whole dish comes together in 20 minutes from start to finish.
By comparison, I typically need 20-30 percent longer in the oven at the same temperature, because there isn’t the same concentrated airflow around the bread. I place the sandwich directly in the basket without parchment paper underneath: the butter on the outside keeps it from sticking, and the air can reach it from below.
Grate the cheese yourself, and keep it within the edge of the bread. Pre-grated cheese is drier and browns faster, and any cheese that falls into the basket burns on and gives a smoky taste.
Tips and tricks from the author: Morten Jensen
Common mistakes and how to avoid them
The mistake I see most often is too thick a layer of grated cheese on top. The cheese doesn’t get a chance to melt evenly, and the excess slides down into the basket, where it burns on. An even layer that stops a couple of millimeters inside the edge of the bread is plenty. The second mistake is skimping on the butter or using a margarine with a high water content: then the surface steams instead of searing, and you end up with a dry sandwich with no crust. Use soft butter, and cover the whole surface right out to the edges. The third mistake is overfilling the basket. If the sandwiches sit on top of each other or crammed together, the air can’t circulate, and you get soft spots in the middle of the bread. Lay them in a single layer with space between them, and run two batches instead.
How to serve the grilled cheese sandwich
The sandwich is filling on its own, but it turns into a proper lunch with something fresh or tangy on the side:
- A handful of crisp lettuce with a simple lemon dressing
- Pickled red onions or gherkins that cut through the rich cheese
- Slices of tomato and cucumber sprinkled with flaky sea salt
- A dollop of Dijon mustard or chili mayo for dipping
- A cup of hot tomato soup on a cold day
Storage and reheating
The grilled cheese sandwich is best straight from the basket, where the contrast between the crispy crust and melted cheese is at its greatest. If you have leftovers, they’ll keep covered in the fridge for up to two days. Reheat them in the airfryer at 180°C for three to four minutes — not in the microwave, which makes the bread chewy. You can also assemble the sandwiches in advance and leave them unbuttered in the fridge; butter the outside just before they go in the basket, so the bread doesn’t soak up the fat.
The grilled cheese sandwich gives you a lot back for the effort: a handful of ingredients, one layer in the basket and 20 minutes. Once you’ve found your favorite cheese for the top, you’ll make it almost without thinking.
FAQ
The grilled cheese sandwich is buttered on the outside and topped with grated cheese, so it comes out both pan-crisped and gratinéed. Regular toast is toasted dry in a toaster or pan, with no cheese on the outside.
A firm cheese with good melting properties. Choose a mature yellow cheese, optionally mixed with a little cheddar for flavor, and grate it yourself — pre-grated cheese is drier and browns faster at 180°C.
10 minutes at 180°C. If the sandwiches are in a single layer with space between them, you don’t need to flip them; the cheese on top is gratinéed when the edges turn golden.

Recipe

Grilled cheese sandwich in the airfryer
Cooking Guide
Keep the screen on and follow the recipe step by step while you cook.
Step 1:
Avoid the screen turning off while you cook.
Step 2:
Start the guide and follow the recipe one step at a time.
Cost of the dish
Prices may vary depending on where you shop.
Our estimate is based on average food prices for the current year 2026.
Estimated price for the whole dish:
Airfryer size
All our recipes are tested in a Philips Airfryer 2000 Series NA230/00 – 6.2 L
Does the recipe fit my Airfryer?
If you’re unsure, you can always reduce by one serving in the recipe, or click the 0.5x button.
You can also Ask the AI Chef
It’s easy! Just press the Ask the AI Chef button you see at the bottom.
Shopping list
Ingredients
How to make it
Preparation
- Grate the cheese coarsely if you’re not using pre-grated cheese. Keep the two portions separate — one goes inside the sandwich, the other is sprinkled over at the end.
- Turn four of the slices buttered-side down, and spread them with 2 tsp Dijon mustard. Distribute 8 slice cooked ham on top, and sprinkle 100 g grated cheese over. Place the last four slices on top buttered-side up, and press the sandwiches together lightly.
Cooking in the airfryer
- Preheat the airfryer to 180 °C. Line the basket with a piece of airfryer parchment paper so melted cheese doesn’t burn onto it.
- Place the sandwiches in the basket in a single layer, and cook them for 6 minutes at 180 °C. Turn them carefully after 3 minutes so both sides turn evenly golden.
Serving
- Remove the sandwiches, and let them rest for 1 minute so the melted cheese sets. Cut each sandwich diagonally, and serve immediately while the bread is crispy.
Our notes for the recipe
Press the sandwiches together lightly before adding them to the basket, and arrange them in a single layer with space in between. The cheese on top should only be added after flipping — otherwise it will burn onto the basket instead of gratinating. Variation:
Swap the ham for smoked turkey, or add a couple of thin tomato slices under the cheese. A little grated parmesan mixed into the topping gives a stronger, nuttier flavour. Serving:
Serve with a simple green salad, pickled cucumbers or a dollop of ketchup on the side. Portion size:
If your airfryer is smaller, you can make the sandwiches in two batches and keep the finished ones warm in the oven at 75 °C.
Your notes for the recipe
Nutrition per serving (Guideline)
Important about shelf life and nutrition
Nutrition per serving (guideline): Calculations are based on data from the United States Department of Agriculture (USDA). Shelf life (guideline): Shelf life data is provided, as far as possible, by public institutions, including national food authorities. Our information is therefore only indicative, and it is your responsibility to obtain and calculate accurate information about shelf life and nutrition for all recipes on airfryerkogebogen.dk
Easily share the recipe with others:
Via email or on Facebook
Open the recipe on your phone
Scan the QR code with your phone and get the recipe directly on your mobile while you cook.

Author
Airfryerkogebogen.dk